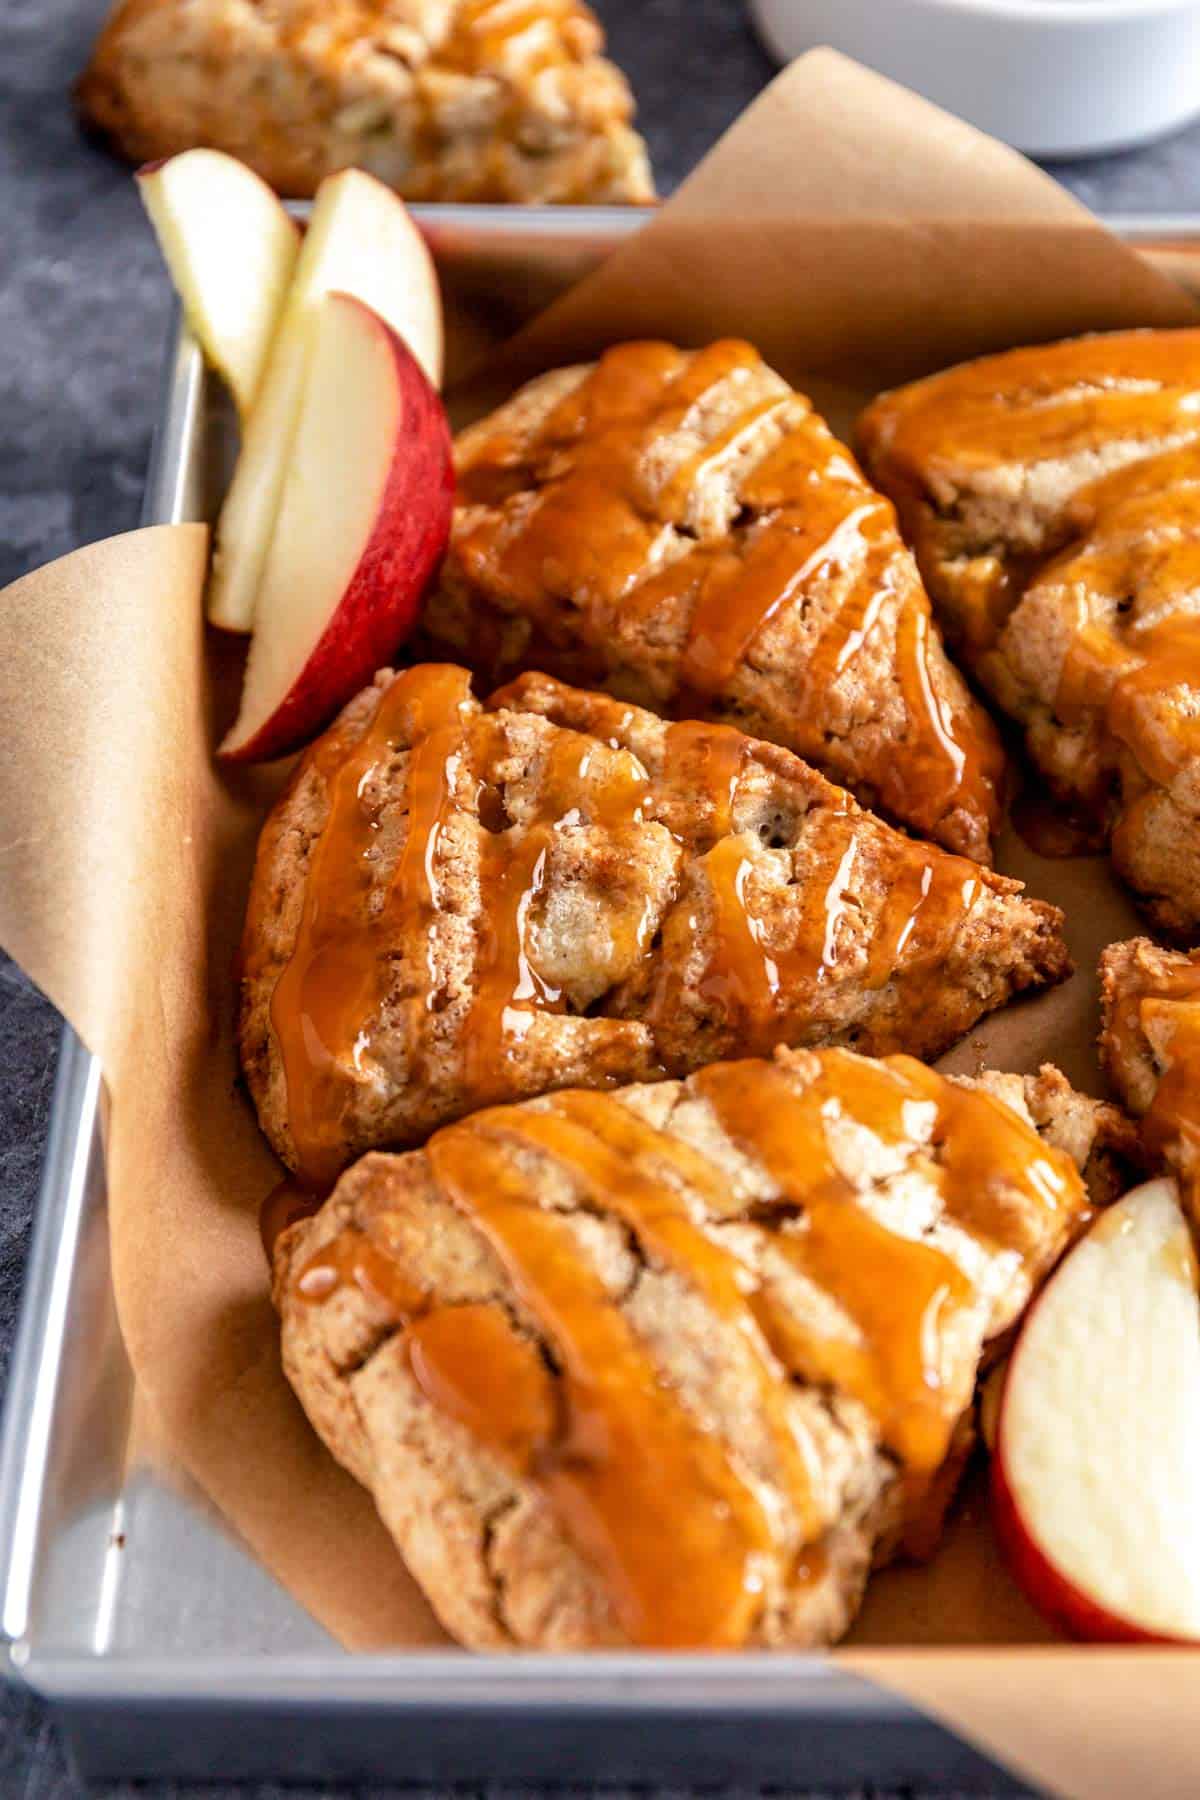
These moist and crumbly Apple Scones are easy teatime snacks made of fresh apples flavored with cinnamon and vanilla. They are brushed with cream and sprinkled with sugar before baking to give them a sweet and golden finish! It is a gluten-free, warm-spiced pastry that you can enjoy any time of the day.

If you are looking for more gluten-free autumn goodies, try our Chocolate Pumpkin Bread and Apple Cobbler too.
Jump To
Why You’ll Love This Apple Scones Recipe
- Flavor and Texture. Tender scones, flaky inside with pops of sweet and spicy crunch from the apple bits and cinnamon. They are made with heavy cream and butter to give them a richer flavor and moist texture.
- Customizable. While apples and cinnamon are a match made in dessert heaven, there is nothing stopping you from swapping apples and cinnamon with different fruits/berries and spices.
- Bake like a pro! This is the perfect recipe for beginners and experts alike. The great thing about these is that you can make the dough in just 10 minutes with just a mixer and a few bowls. The rest of the time is allotted for chilling and baking.
- An all-day snack. These fruity scones can be enjoyed for breakfast, brunch, as an afternoon snack, and are also sweet enough for dessert. Enjoy it anytime you please- even in the middle of the night!
- Make ahead and freeze-friendly. You can make several batches and freeze the dough wedges ready for baking when you are in the mood for something sweet and warm-spiced.
Ingredients

- Apples - use baking apples like Braeburn, Cortland, Golden Delicious, Honeycrisp and Granny Smith apples. They hold their shape well on high heat and retain some of their crunch. Just use whatever you have during apple season!
- Ground cinnamon - a warm and aromatic spice to enhance a classic baked pastry. You can use other spices like nutmeg, cardamom, allspice, and pumpkin pie spice as alternatives.
- Flour - I used Bob’s Red Mill gluten-free flour for this recipe. You can use regular all-purpose flour 1:1 as an alternative. King's Arthur GF flour is also a great option.
- Granulated sugar - aside from providing sweetness, white sugar also makes the homemade scones crisp and golden. You can also use brown sugar, though it will yield a softer, cake-like texture. If you want to sprinkle some sugar on the tops of the scones, use coarse sugar.
- Baking powder - this leavening agent will make the scones puff as they bake which will make them super tender!
- Unsalted butter - cold and cut into cubes. These will create pockets of fats in the dough that will burst during baking, creating flaky and fluffy scones! If you have salted butter, you can use that and omit the salt in this recipe.
- Vanilla extract - for more flavor and aroma.
- Heavy cream - for a rich-tasting dough that bakes up beautifully golden and tender! You can also use half-and-half too.
- Egg - this will bind the ingredients together so the dough keeps a steady structure during baking.

Preparations
- Preheat your oven to 400°F (200°C).
- Line the baking sheet with parchment paper.
- Peel and dice the apples.
- Bring eggs to room temperature.
- Slice the butter into cubes and keep them cold.
- Measure the rest of the ingredients.
Instructions
Combine the dry ingredients. In a large bowl or the bowl of a stand mixer, combine flour, sugar, baking powder, and salt.


Cut the butter into the flour mixture. Incorporate the butter into the flour mixture using either a pastry cutter or by gently pressing the pieces between your fingers until they resemble pea-sized crumbles.
Then, add the diced apples.


Make the dough. In a separate small bowl, whisk together wet ingredients: the cream and egg until well combined.
Pour this mixture over the flour mixture and gently blend it in with your hands or a silicone spatula, ensuring the mixture is mostly moistened but still somewhat crumbly.

Knead and slice to wedges. Turn the dough out onto a lightly floured surface and knead it gently a few times to form a ball.
Flatten the dough into an 8-inch circle, then slice it into 8 wedges.


Chill the dough wedges. Arrange the wedges on a prepared baking sheet lined with parchment paper or a silicone baking mat and place them in the freezer for 20 minutes to firm up.
Place in pan and garnish. After the chilling time, transfer the scones to a larger baking sheet, spacing them about 2 inches apart.
Lightly brush the tops with additional cream and sprinkle sugar over them.
Bake in the preheated oven for approximately 20 to 25 minutes, or until the scones' tops turn a light golden brown, and their bottom edges become golden.
Please note that baking time may vary due to different ovens and altitudes.
Allow them to cool for at least 10 minutes before serving.
We love to serve this apple scone recipe with homemade pumpkin caramel, toffee or maple glaze.
📋 How do these scones taste? - Like a warm fluffy cinnamon apple pie with tart apples, but in the form of pastry with flaky layers and sweet caramel drizzle.
Tips
- Apple size. If you want the apple bits to retain a crunchy bite, dice the apples a bit bigger. Make sure that they are evenly sliced to get the best result.
- Do not overwork the dough. It is okay to have a coarse dough with a few small lumps, it does not have to be smooth. An overworked dough will result in a tough and chewy scone.
- Use cold butter. It is important to use cold butter to get the perfect texture. Bring it out of the fridge only when ready to use. It is also advisable to use chilled cream.
- Chill the dough. This process will allow the butter in the dough to firm up again and make the scones super tender and flaky!
- Do not overbake! Take note that not all ovens produce the same amount of heat, so make adjustments as you go. Bake until the tops are a light golden brown and let the scones cool in the pan to firm up before serving.
Serving Suggestions
It's such an easy fall recipe and it is best served while still warm!
Place a dollop of cream on top and add more apples or berries if you like.
You can also go traditional and serve with clotted cream, and jams.
Freezing And Storing Instructions
- To Store. Once the warm scones have cooled down completely, put them in an airtight container and place them in a dry and cool spot at room temperature. Leftover scones can be stored for up to 3 days in the kitchen and in the fridge for up to a week.
- To Freeze. Wrap the scones individually in foil or place them in freezer bags. They can stay frozen for up to three months. For better texture and flavor I prefer freezing unbaked scones (and only add the cream topping once thawed and ready to bake).
- To Reheat. Place the frozen scones in the oven for a few minutes until warmed through.

Add-ons and Possible Variations
- Use different fruits and spices. Aside from apples and cinnamon, try this recipe with peaches, cherries, strawberries, and blueberries with cardamom, pumpkin pie spice, or thyme.
- Make it savory. You can also give it a savory and meaty twist by adding bacon or ham bits instead of apples. Do not forget to omit the cinnamon or replace it with garlic and onion powder.
- Make it vegan! Use dairy-free butter and cream and replace the egg with applesauce, buttermilk, flaxseeds, or chia seeds.
- Add more cinnamon. If you prefer a stronger cinnamon flavor to your scones, you can mix some with the granulated sugar sprinkle.
- Add more sweetness. Drizzle your apple cones with caramel sauce or maple syrup.
FAQs
Scones are classic British quick bread made using baking powder instead of yeast. They are traditionally sweetened with raisins, currants, or dates and are served as part of afternoon tea with clotted cream and jams.
Yes, you can, but take note that you have to replace the baking powder with baking soda if you are subbing. Since baking soda is a lot stronger, use only a third of the required amount in the recipe.
While it is much healthier this way, keeping the apple peal will affect the texture of the scones, so I recommend removing them.
This can be because of too much baking powder added to the dough.
More Desserts
For all baking recipes, hop on to our Desserts collection.
I would appreciate it so much if you left a comment about this recipe below! Subscribe to join the TYB newsletter and receive free recipes straight to your inbox! Let's connect via Facebook, IG & Pinterest!
Recipe

Gluten Free Apple Scones
INGREDIENTS
- 2 cups flour, 240g, I used Bobs Red Mill Gluten free 1:1 flour
- ⅓ cup granulated sugar, 66g + more for sprinkling on top
- 2 teaspoon baking powder
- ½ teaspoon salt
- ½ cup cold unsalted butter, 113g, cubed
- 1 ½ cup apples, peeled
- 1 teaspoon ground cinnamon
- ¾ cup heavy cream , + additional cream for brushing the scones
- 1 large egg, room temp
- 1 teaspoon vanilla extract, pure kind
INSTRUCTIONS
- Preheat your oven to 400°F (200°C). Line the baking sheet with parchment paper.
- Combine the dry ingredients. In a mixing bowl or the bowl of a stand mixer, combine flour, sugar, baking powder, and salt.
- Cut the butter into the flour mixture. Incorporate the butter into the flour mixture using either a pastry blender or by gently pressing the pieces between your fingers until they resemble pea-sized crumbles. Then, add the diced apples.
- Make the dough. In a separate small bowl, whisk together the cream and egg until well combined. Pour this mixture over the flour mixture and gently blend it in with your hands or a silicone spatula, ensuring the mixture is mostly moistened but still somewhat crumbly.
- Knead and slice to wedges. Turn the dough out onto a lightly floured surface and knead it gently a few times to form a ball. Flatten the dough into an 8-inch circle, then slice it into 8 wedges.
- Chill the dough wedges. Arrange the wedges on a small baking sheet lined with parchment paper or a silicone baking mat and place them in the freezer for 20 minutes to firm up.
- Place in pan and garnish. After the chilling time, transfer the scones to a larger baking sheet, spacing them about 2 inches apart. Lightly brush the tops with additional cream and sprinkle sugar over them.
- Bake in the preheated oven for approximately 20 to 25 minutes, or until the scones' tops turn a light golden brown, and their bottom edges become golden. Allow them to cool for at least 10 minutes before serving.
VIDEO
NOTES
- Apple size. If you want the apple bits to retain a crunchy bite, dice the apples a bit bigger. Make sure that they are evenly sliced to get the best result.
- Do not overwork the dough. It is okay to have a coarse dough with a few small lumps, it does not have to be smooth. An overworked dough will result in a tough and chewy scone.
- Use cold butter. It is important to use cold butter to get the perfect texture. Bring it out of the fridge only when ready to use. It is also advisable to use chilled cream.
- To Store. Once the warm scones have cooled down completely, put them in an airtight container and place them in a dry and cool spot at room temperature. Leftover scones can be stored for up to 3 days in the kitchen and in the fridge for up to a week.
- To Freeze. Wrap the scones individually in foil or place them in freezer bags. They can stay frozen for up to three months. For better texture and flavor I prefer freezing unbaked scones (and only add the cream topping once thawed and ready to bake).
ADD YOUR OWN PRIVATE NOTES
NUTRITION
Note: Nutrition information is estimated and varies based on products used.
Full Nutrition Disclaimer can be found here.




Julia | The Yummy Bowl
You'll love how easy is to make these quick apple scones! Choose your favorite fruit and berries for more fun variations!